Puppeteer Tutorial (Mastering Puppeteer Web Scraping)
Anyone who’s been scraping the web for a while knows the critical role automation plays in it. While you could resort to extracting data manually by going through your sources and copy-pasting the content that interests you onto your database, the process would be extremely time-consuming and tedious. Using the right tools for web scraping is vital in the optimization of your data research tasks. It allows you to dedicate more time and effort to other essential business duties that need your attention, rather than focusing on handpicking relevant information piece by piece.
However, even when using automated tools, you might still come across some challenges while going about your web scraping endeavors. Most of the web seems to be ruled by JavaScript these days. This client-side programming language is often used in scripts and files that are injected into the HTML response of a site to be processed by the browser. When the content you want to scrape is directly rendered by JavaScript, you can’t access it from the raw HTML code. That’s when you need to take some actions that may require additional tools, like headless browsers.
Using Puppeteer to automate your browser when web scraping is an effective solution for your JavaScript-related issues. This Puppeteer tutorial is intended to help you improve your web scraping experience and expedite your data gathering work. Feel free to use the table of contents below to skip to the parts of this guide that interest you the most.
Scraping the Web With Headless Browsers

There are two primary methods of accessing data from sites on the web. One is by manually seeking and collecting data, and the other is by automation. Using packages to fetch a site, send requests to the server, and get back HTML content you can parse into a machine-readable format like XML, CSV, or JSON is a quick and effective way to extract data from the internet.
Yet, this technique is not as useful when scraping dynamic sites rendered by JavaScript. To manage these websites, you need to load them using a browser, but not a regular one.
Why use headless browsers?
The web browsers you know and love are great for your everyday web surfing activities. However, they take a lot of resources when loading buttons, toolbars, icons, and other graphical user interface elements that you don’t necessarily need when using code to scrape the web. Moreover, when extracting data from them, your crawler might experience some hiccups that will certainly slow down the whole operation. That’s when a headless browser may come in handy. It will let you do all the things a regular browser would but from a programmatic angle.
Examples of headless browsers
Generally, most common browsers can run headless. Chrome is probably the most popular one to be compatible with headless mode. Typically, headless browsers are executed with command lines or network communication. Scraping the web with a headless browser streamlines the process and allows you to quickly navigate websites and collect public data while using less memory.
With more and more websites relying largely on Ajax technology and JavaScript-rich features, headless browsers are a modern-day web scraping necessity, and so are the controllers and drivers that allow them to work better. Enter Puppeteer.
What Is Puppeteer?
Popular among web scrapers and testers, Google Puppeteer is a Node library that offers a high-level API to control headless browsers over the DevTools protocol. In other words, it makes automating web actions easier and paves the road for simple and solid web scraping. Being developed by Google, Puppeteer is meant to be most effective when using Chromium and Chrome.
However, since many other browsers use Chromium as their base, you can still benefit from using Puppeteer when scraping with them. If needed, Puppeteer can also be configured for non-headless mode.
Lots of teams that rely on scraping data for business optimization purposes leverage headless browser automation using Chrome Puppeteer. This library’s API allows you to control headless browser instances remotely and use them as a launching point for JavaScript rendering. According to the official puppeteer documentation, there are currently two packages maintained for Puppeteer users:
- Puppeteer – which is the main package. It’s entirely built with browser automation in mind, and it downloads a version of Chromium when installed. It can be considered the end-user interface of this project.
- Puppeteer Core – which is the Puppeteer library and can interact with any browser that supports the DevTools protocol. It could be seen as the backend of the automation tool.
As mentioned above, using Puppeteer allows you to do most of the tasks you can perform manually in your favorite browser. You can use Puppeteer to:
- Capture screenshots
- Generate PDF files
- Crawl a single-page application
- Generate server-side rendering and other pre-rendered content
- Automate form submission and keyboard input
- Capture a timeline trace of a site
- Test extensions
The Chrome DevTools team is in charge of keeping the Puppeteer library up to date. Yet, Google welcomes third-party input and collaboration to help keep the project running smoothly and advance the library’s availability of cross-browser coverage. Although there are numerous alternatives to control headless browsers, Puppeteer might just be the best one if you need a lightweight and speedy headless browser for web scraping.
Puppeteer, however, does have some limitations. The developers see this library and Chromium as an indivisible entity, which is why Puppeteer inherits most of Google’s open-source browser’s shortcomings. This package might not behave as expected when handling sites with audio or video features because it doesn’t support licensed formats, like ACC or H.264, and HTTP Live Streaming.
Puppeteer vs. Selenium
Selenium is a widespread framework that supports headless browsers and allows you to automate web applications and web-based administration for testing purposes. It comes in two parts:
- Selenium WebDriver — to create browser-based automation suites and tests.
- Selenium IDE — to create quick bug reproduction scripts.
Unlike Puppeteer, which is very easy to install using the npm tool, Selenium is not as straightforward. This framework supports many languages and numerous browsers. That’s why it may have different setup processes depending on your specific needs. You may have to install different web drivers to work with your preferred browser.
When it comes to multi-platform support, Selenium is the indisputable champion. This feature makes it easier for testers to do their job across major web browsers. Selenium can be used in mobile app testing as well. Puppeteer comes out top in automation capabilities, though. Since it works with the most-used web browser to date, it allows for efficient web automation tasks for the great majority of users.
Using Puppeteer for web scraping purposes is quite easy. However, Selenium is more scalable and works better for larger projects. It’s important to note that, due to its more complex features, Selenium may run slower than Puppeteer.
Puppeteer vs. Playwright
Playwright is another Node.js library used for browser automation. It was largely developed by the same team that brought Puppeteer to life, so they have similar APIs. Yet, Playwright is still pretty new and hasn’t even reached a 1.0 release yet. It might still need a little fine-tuning before being able to fully compete with Puppeteer. Keep in mind Puppeteer is still under active development, so it could be hard for Playwright to catch up.
Playwright also comes with one valuable toc vcol that Puppeteer still lacks: cross-browser support. Playwright makes things much easier in this department, while the Puppeteer developing team is still taking a cautious approach to it. Puppeteer may work well with Chromium-based browsers, but it doesn’t have official cross-browser support yet. Playwright could be more appealing to iOS users since, unlike Puppeteer, it offers WebKit support.
Puppeteer vs. Cypress
Another contender in this race is Cypress. It is a JavaScript-based, open-source tool for web browser automation and testing that uses DOM manipulation techniques. Some users have claimed Cypress is more reliable when it comes to clicks and testing timeout. Cypress was essentially designed for end-to-end testing, and Puppeteer is not a test runner per se. It is the Chromium version of node modules, and it’s designed with browser automation in mind.
When competing with Cypress in quick testing and web scraping, Puppeteer comes out undefeated. Another point in favor of Puppeteer is that it runs much faster than Cypress. However, Cypress offers users some features Puppeteer doesn’t have, like containing its assertions instead of depending on Jest, Mocha, or Jasmine to perform certain tasks. Cypress also has its own integrated development environment and comes with its own dashboard.
Puppeteer vs. Zombie.js
While Puppeteer is a Node library that provides a high-level API to control Google’s headless browsers, Zombie.js is a headless browser itself. Both tools can be used for automated testing, browser testing, and web scraping. Zombie is designed in JavaScript to functionally test websites running locally without a browser.
Zombie.js lets you run your website and application tests without a real web browser, which means the HTML page doesn’t need to be displayed at all, and therefore, you won’t waste your time rendering. By using a simulated browser where it stores the HTML code, it allows you to run the JavaScript that may be stored in the HTML page. This is great news for those scraping Java-rich sites, but not something Puppeteer cannot do.
Unlike Puppeteer, Zombie.js lacks full documentation, which makes it more challenging to use than its counterpart. As it doesn’t render the page, it cannot support screenshots as Puppeteer does. On the bright side, Zombie.js is lightweight and easy to integrate with JavaScript projects. This headless browser also provides assertions that you can access straight from the browser object. Plus, it provides methods to handle tabs, cookies, and authentication.
Puppeteer vs. PhantomJS
Aside from the most mainstream options like headless Chrome and Chromium, PhantomJS is of the most popular headless browsers available. Yet, unlike the two examples previously mentioned, this headless browser alternative is not available in any other mode but headless. This might not be so convenient if you need any kind of user interface at some point in your research or testing.
Another downside PhantomJS has is that it’s no longer under development, unlike Puppeteer, and the repository has been declared abandoned. Although you can still use this headless browser, it can no longer get any additional features, upgrades, or patches, and it won’t be long until it can’t keep up with other tools.
While typically lighter than full browsers, PhanthomJS still has some overhead in terms of maintenance and performance. That’s because you often end up having this headless browser connected to your testing framework via WebDriver.
Puppeteer vs Splash
As stated, Puppeteer is a Node library with a high-level API to control Chromium-based headless browsers over the DevTools Protocol. Yet, this tool can also be configured to use a full browser. Splash, on the other hand, is merely a headless browser that executes JavaScript for users crawling websites. It presents some of the same issues as Zombie.js, as it’s unable to render full sites as needed.
Splash is the primary thought for Python enthusiasts. It is a JavaScript rendering service with an HTTP API implemented in Python 3 using Twisted and QT5. It makes a nice, lightweight browser with asynchronous features that let you process multiple web pages in parallel, get HTML results, take screenshots, and write scripts.
Splash can be integrated with Scrapy to extract code from different websites This headless browser is considered a jack of all trades for testing, yet it lacks the stability, documentation, and community Puppeteer has built over time.
Puppeteer vs HtmlUnit
HtmlUnit is a headless browser written in JavaScript. It allows you to use this programming language to automate many basic website interactions like clicking links, HTTP authentication and header performance, filling and submitting forms, etc. This tool, unlike Puppeteer, can simulate several different browsers and create scripted use cases in most of the mainstream alternatives.
Pyppeteer: The Alternative for Python Users
Python is a widespread alternative among developers these days when it comes to selecting a programming language to build an effective web scraping tool. This interpreted, object-oriented option offers high-level data structures as well as dynamic typing and binding functions, making it incredibly attractive for scripting and Rapid Application Development. Python has an easy-to-learn syntax that increases productivity and simplifies the data extraction process for business. It supports several modules and packages that promote program modularity and code reuse.
Being a Node package, Puppeteer is exclusive to JavaScript programmers. Puppeteer and Python developers need to resort to Pyppeteer, which is an unofficial Puppeteer port for Python that also bundles with Chromium and other browsers. Pyppeteer’s syntax uses the asyncio library and offers you almost total control of your headless browser of choice. Among other automated browsing actions, this port is used to:
- Open tabs
- Analyze the Document Object Model in real-time
- Execute Javascript
- Connect to a running browser
The Benefits of Puppeteer Web Scraping

According to Google developers, one of Puppeteer’s primary goals is to provide users with a slim, canonical library that emphasizes the capacities of the DevTools protocol. It’s also meant to offer a reference implementation for other testing libraries and frameworks and grow the adoption of automated browsing.
Puppeteer is an excellent tool to catch bugs and learn more about headless browsing user pain points. This Node library adapts to the Chromium principles, which are:
- Speed
- Security
- Stability
- Simplicity
Puppeteer has little to no performance overhead when handling automated pages. It operates off-process, which makes it significantly safer to automate sites that could be malicious in nature. The package’s high-level API is highly intuitive, making it easier to understand, use, and debug for developers.
Puppeteer Tutorial: Setting Yourself Up for Success

Before you start coding, you’ll need to download and install the basic tools: your code editor of choice and Node.js. The latter is a runtime framework that can help you run JavaScript without a browser. Before moving on to our Puppeteer example, please note that all the code for this Node.js library is run by this framework and written in .js files.
1. Set up a directory
Once you have all the required prerequisites, you’re going to create a folder to store your JavaScript files. Next, navigate to it and run the “npm init-y” command, which will create a package.json file in the directory and install all your Node.js packages in it.
2. Running Puppeteer
As mentioned above, Puppeteer is bundled with the corresponding version of Chromium. When you install it on your machine, it downloads the browser version that’s guaranteed to work with your version of Puppeteer.
To install and run Puppeteer, you’ll have to run the npm install command directly from the terminal. Make sure the working directory is the one that contains the package.json. Keep in mind that, since Puppeteer performs asynchronous calls, you’ll mainly use async/await syntax.
3. Create a new file
You’ll have to create a new file in your node package directory, which is the one that holds the node_modules and pachahe.json. Save it with your preferred name. You could call it “myscraper.js”
Next, launch the browser using the “const browser = await puppeteer.launch*();” command. This will deploy Chromium in headless mode. You can include an object as a parameter if you need a user interface, in which case, your command will be “const browser = await puppeteer.launch({headless:false});”
4. Open a page
Use the command “const page = await browser.newPage();” to open a page. Once your page is available, you can load any website with a simple goto() function and the URL of the site in question. For example, “await page.goto(‘https://www.thewebsiteyouwanttoscrape.com/’);”
It’s a good practice to take a screenshot to verify the rendered page and the DOM elements are available. If you need a specific image size, you can change the settings in the viewport beforehand. Once you’re done, close the browser with the “await browser.close();” command, and run the file from the terminal using “node myscraper.js”. This last command should create a new png file in the same directory.
5. Start scraping
When you use Puppeteer to render a page, it loads it in DOM, which allows you to retrieve any type of data from it. You can use the evaluate() function to execute JavaScript functions more easily.
Open the site you’ll scrape in your preferred browser, right-click an element (for example, the header), and select inspect. This will open DevTools with the Elements tab activated, and you’ll be able to see the ID and class of the selected element.
Once you’ve identified these factors, you can extract them in the Console tab of the DevTools toolbox with a “document.querrySelector(‘#elementid’)” command. Use the evaluate function to ensure your querySelector can be run. You can then store the result in a variable to complete the functionality. Don’t forget to close the browser when you’re done.
If you’re looking to scrape multiple elements, you’ll need to use querySelectorAll. This will fetch all elements that match the selector. Next, create an array and call the map() function to process and return each element in it. Use the page.evaluate() function to surround these commands. Once you’ve finished, you can save your.js file and run it from your terminal.
Using Pyppeteer for Web Scraping

If you prefer scraping with Python, using Pyppeteer is the right solution for you. But, as always, before you start scraping data, you need to download and install the appropriate libraries.
Generate a Python virtualenv with pipenv, and install:
- $ pipenv –three
- $ pipenv shell
- $ pipenv install pyppeteer
This will give you the basic tools to start using Pyppeteer. The library will automatically download Chromium, so you can launch it in headless mode when you need it. Once you’ve downloaded your libraries, execute the following commands:
- import pprint
- import asyncio
- from pyppeteer import launch
Use the extract_all(languages) function as an entry point for your application, which will receive your target URL dictionary and let you invoke the get_browser() function. If you need the user interface, remember to set your parameter to “false” so that it doesn’t launch headless mode by default.
Next, go through the URL dictionary with the extract function, and use get_page to open a new tab in the browser. Now, you can load the URL from the site you’re trying to scrape.
Lastly, you can start your data extraction with extract_data. Select your tr nodes using the XPath selector “//table[@class+”infobox”]/tbody/tr[th and td].” This will also throw out the th and td child nodes. To extract the text from each of them, you’ll need to code in a function written in JavaScript. The latter will be executed in the browser and return the results you need.
Challenges You May Find When Scraping the Web With Puppeteer

Many websites nowadays constantly require you to verify you’re actually human before they let you perform any requests — which is ironic, considering it’s a robot determining you’re not one. Web scraping automation tools run into these anti-robot measures all the time too, causing them to be unable to perform their web scraping functions efficiently (or, sometimes, at all).
Some of the challenges you can find when using a Puppeteer scraping tool to extract data from your favorite sites are:
- CAPTCHAs — these are challenge-response tests that are difficult for computers to perform but are rather easy for humans. These puzzles may include recognizing some elements from a series of images, rewriting a code, or clicking on a check box.
- Honeypot traps — which are links that are invisible to human eyes but are easily detectable (and therefore clickable) by scraping bots. In consequence, falling into a honeypot trap will automatically confirm it’s a bot and not a human, sending all requests. This will trigger the site’s security mechanisms and stop your scraping tool in its tracks.
- IP Bans — although temporary in most cases, this measure might be the most drastic of them all. When a site’s admin is certain a bot is interacting with their site, they’re likely to ban their IP to prevent them from extracting sensitive data.
Your web scraping tool can retrieve empty values if a page loads too slowly as it sends its requests. Or, as mentioned previously, it can come across some JavaScript elements it’s not designed to process.
With Puppeteer, you can bypass a lot of these issues. This Node.js library allows you to navigate pages and wait for elements to load as a human would. The asynchronous nature of Puppeteer allows it to deal with the data flow from the server. What’s more, it lets you simulate keyboard and mouse movements, and emulate numerous devices with the setUserAgent and setViewPoint functions.
Most websites periodically upgrade their UI design and incorporate improvements to make the digital experience more attractive. Those changes in the site’s HTML code can become an obstacle in your web scraping exercise. Programming your own web scraping tool allows you to make the necessary adjustments to your code when the site changes its layout. Monitor the site every few weeks to avoid receiving incomplete data or having your scraper crash.
While automation will help you expedite the data extraction process to save time and effort, you’ll still need to constantly monitor the data you’re receiving. That’s an excellent way of ensuring the data quality stays up to your standards. Keep in mind that faulty data could potentially render your investigation useless.
Web Scraping Misuse and Dubious Practices
Web scraping may be a bit controversial for some. That’s because it’s not uncommon for malicious actors to misuse web scraping technology. This doesn’t mean web scraping is a wrong practice, but it’s vital to keep it on the ethical side. These are some of the reasons why multiple website owners implement anti-scraping mechanisms:
Plagiarism
Web scraping tools allow you to collect all forms of content from all over the web, which is not necessarily a bad thing. However, reproducing the data you scrape without the author’s explicit permission is not only frowned upon but also illegal. Plagiarism is a practice nobody takes lightly these days, and for good reasons. You should never take someone else’s work and publish it as your own. The Digital Millennium Copyright Act states that if a person or a company uses scraping solutions to commit plagiarism, they may incur a monetary loss.
Spamming
Nobody on the internet likes receiving unsolicited emails or calls promoting something that’s completely unrelated to their interests. Yet, unethical data scrapers use automated tools to collect email addresses, mobile numbers, and other contact information so they can send ads. Web scraping is an easy way to gather this type of information, but being easy doesn’t make it right.
Identity theft
People with nefarious intentions can use web scraping to extract data from social media profiles and other platforms to commit identity theft. Crawling data with the intention of scamming people is a rising internet threat. It’s best not to use web scraping technology to collect people’s sensitive information.
Keeping Your Puppeteer Scraper Ethical

Much like any other activity, web scraping has its own set of rules. Keep in mind some sites can be extra wary of crawlers and other automated tools for data extraction, simply because they want to keep their information and servers safe from cybercriminals.
If you want to benefit from having your own Puppeteer web scraper, you’ll need to play nice and abide by the site’s regulations. Remember, just because data is available doesn’t mean it’s rightfully yours to take. These actions will keep your web scraping practices ethical.
Respect the robots.txt file
Many websites have a robots.txt file to communicate their rules regarding web scraping tools and other automation bots. This file dictates what you can scrape and what’s off-limits. It can also dictate what the right crawling frequency is and how much you need to space out your requests. Ignoring the site’s wishes is highly unethical. There’s a reason they’re expressing these preferences, and you have to honor them if you want to avoid IP bans or other anti-bot measures.
Some sites might not allow scraping at all. If a website’s telling you you can gather data under certain conditions, then it’s best to be courteous. If you’d like an exception to be made for you, it’s good practice to contact the web admin directly.
Read the terms and conditions
If you cannot find a robot.txt file, look closely at the site’s terms and conditions. Rather than simply clicking “I agree,” take the time to actually read and analyze the rules of using a certain website.
Be polite
Web scraping can sometimes lead to functionality issues for some sites. With the number of requests, the process can be quite aggressive and generate a bad user experience for a website’s customers. To avoid causing trouble, make sure to only collect data during off-peak hours.
These may change from one site to another, so it might take you a while to get it right. If you’re scraping on a particular time zone, a good way to ensure your scraping attempts don’t look like a DDoS attack is to deploy your spider when people are less likely to be online.
ID yourself
Manners are important when web scraping. If you’ll be sending thousands of requests and causing unusual traffic, let the web admins know who you are and what your intentions are. You can even provide them with your contact information in case they’d like to ask you more questions about your research. The best part: you don’t even have to reach out. Simply adding a User-Agent string with this information should suffice.
Treat data with respect
If you’re given permission to scrape data, it doesn’t mean you’re entitled to grant that permission to others. The information you collect is for your eyes and your team’s only. Passing the data around as if it was yours is not an ethical practice. If it’s absolutely necessary for you to publish part of the data you scrape, remember to give credit where it’s due. This will redirect traffic back to the original author’s website.
Best Proxies to Scrape a Web Page With Puppeteer

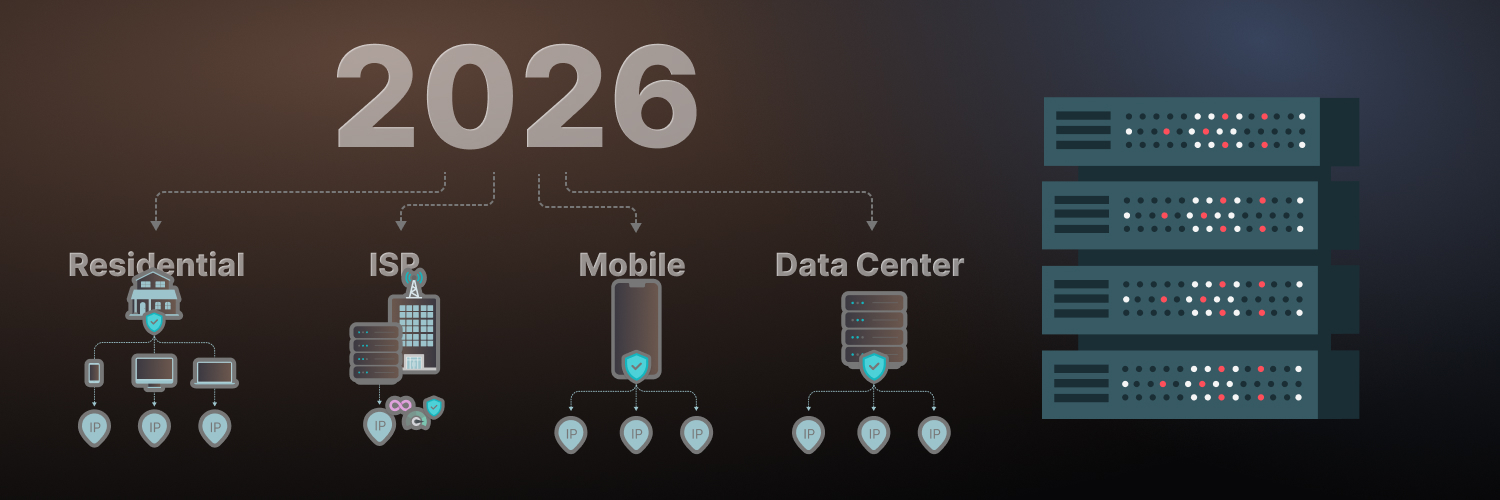
Keep in mind that headless browsers are normally meant for automated access, which, as stated above, is frowned upon by many sites. When using headless mode, you still might stumble upon anti-bot mechanisms. That’s why, if you’re working on a serious scraping project, you’ll need to incorporate some bypassing techniques to your Puppeteer web scraper, like proxies. These are the two main types of proxies that will help you keep your Puppeteer scraping exercise as successful as possible.
Rotating data center proxies
These are the most common types of proxies. As the name implies, they come from a data center, which means they’re not at all associated with an Internet Service Provider. There are many advantages and disadvantages linked to data center proxies. For example, they give you an unmatchable degree of anonymity because they’re not connected to a real location. However, this element makes it only more obvious that they’re a proxy and not a real user address, which might not sit well with some sites.
If you think rotating data center proxies are the most suitable option for your web scraping needs, contact Rayobyte. We offer roughly 300,000 IP addresses located in more than 27 Countries for you to focus on your data-collecting endeavors. With our nine autonomous system numbers and over 20,000 unique C-class subnets, we can help you keep IP bans at bay. We offer automatic 30-day replacements and instant individual replacements to keep your web scraping exercise successful.
Rotating residential proxies
This type of proxies are generated by an Internet Service Provider and are tied to a physical address. They look more authentic than most types of proxies available because they come from real users. That’s why websites can hardly — if at all — tell the difference between a residential proxy and a normal IP address. They’re pretty much the same, so they’re less likely to get banned than data center proxies.
Residential proxies are more reliable than their data center counterparts. Since you’re using real user IPs, you don’t have to worry about subnet ban. The main downside of these proxies, however, is the price tag. Residential proxies tend to be much more expensive than data center proxies. Yet, it’s pure quality, security, and reliability that you’re paying for. The rotating residential proxies at Rayobyte are optimized for web scraping. We only use ethically sourced IP addresses and guarantee IP ban protection. Visit our site to learn more and get started today.
The Bottom Line

Web scraping is incredibly useful when seeking success for your company. It will give you incredible insights that you can leverage to stay ahead of the curve and one step ahead of your competitors. Creating your own web scraper with Puppeteer allows for maximum customization in your web scraping activities. The Puppeteer tutorial above will give you all the information you need to use this handy Chromium tool in your favor.
Don’t forget about the importance of using proxies to make the most out of your web scraping exercise. Whether you choose data center or residential proxies, we can offer you a solution that meets your needs and your budget.
The information contained within this article, including information posted by official staff, guest-submitted material, message board postings, or other third-party material is presented solely for the purposes of education and furtherance of the knowledge of the reader. All trademarks used in this publication are hereby acknowledged as the property of their respective owners.

