Log in


 Log in
The Ultimate Guide to Using cUrl With Proxy Servers (A Complete Guide)
If you’re interested in a tool that allows you to test proxies and scrape sites at the same time, you’ve come to the right place. cUrl is a command-line tool that allows you to test proxies and do some simple web scraping. Intuitive and easy to learn, cUrl can also be used to send requests, add cookies, debug, set and connect to proxies, and more.
This step-by-step guide will show you what cUrl is, how to use its various commands, how to use it for light web scraping, and how you can cUrl with proxy servers. It can get a bit complex, so make sure you have at least a basic understanding of what a proxy is before you start reading this guide. Knowing a bit of web scraping will also help.
What Is cUrl?

Short for client URL, cUrl (also known as curl or cURL) is a command tool that allows you to transfer data over the internet. It contains the command line curl.exe as well as a cross-platform library (libcurl) that can transfer data between servers.
cUrl works on all modern operating systems that transfer data over internet protocols, from laptops to cars. It supports almost every internet protocol, including:
- DICT
- FILE
- FTP
- FTPS
- GOPHER
- HTTP
- HTTPS
- IMAP
- IMAPS
- LDAP
- LDAPS
- MQTT
- POP3
- POP3S
- RTSP
- SCP
- SFTP
- SMB
- SMBS
- SMTP
- SMTPS
- TELNET
- TFTP
cUrl has a large community that has developed a number of tools for it. A well-known example is curl-loader, a Linux open-source software performance testing tool. Curl-loader can simulate the application behaviors of hundreds of thousands of FTP/FTPS and HTTP/HTTPS clients. A single curl-loader process can run 2,500 to 100,000 virtual clients, with each virtual client having its own personal source IP address.
The history of cUrl
cUrl’s history goes back to the 90s, when everyone used command-line tools. In 1996, Daniel Stenberg, a Swedish developer, became interested in creating an internet relay chat (IRC) room script that could convert currencies for chat room members. As such, he started contributing to a tool named httpget, a commonly used HTTP method to send data through servers. The result of this experimentation was httpget 0.1, which consisted of “less than 300 lines of a single C file.“
A few months later, file transfer protocols (FTP) came into existence, so Stenberg decided to add support for FTP to his tool. As such, he changed the name of his tool to urlget 2.0. On March 30, 1998, he added support for FTP upload and decided to change the name again, this time to cUrl 3.0.
Despite its potential, cUrl did not get much attention during those early days. In 1998, after 15 updates and re-releases, cUrl was downloaded more than 300 times from Stenberg’s site. In late 1998, cUrl was adopted in Red Hat Linux. In 1999, it became a Debian package, and in August 2001, it was adopted by Mac OS X 10.1. Since 2001, it’s been available by default on almost every piece of software that can connect to the internet: Windows 10, iOS and Android devices, Sony PS5, Nintendo Switch, Xbox, and even cars.
What is libcurl in cUrl?
libcurl is a free open source cross-platform library with a stable API that anyone can use. It’s commonly used with other programs to get access to the cUrl command line tool.
In the summer of 2000, cUrl’s free client-side URL transfer library, libcurl, was finally released to the public. Since then, libcurl has become, in Stenberg’s words, a “de-facto internet transfer API.“
Like the cUrl command line tool, libcurl is portable and flexible. IPv6-compatible and thread-safe, it works and builds identically on many platforms, including rarer ones such as:
- BlackBerry 10
- BlackBerry Tablet OS
- AIX
- NetBSD
- RISC OS
- UnixWare
- Solaris
- Symbian
- FreeBSD
cUrl versus Wget
cUrl works a lot like GNU Wget, which is another command line tool. However, there are some key differences:
- cUrl is powered by libcurl, while Wget has no library.
- cUrl works more like the traditional Unix cat command, while Wget is more similar to cp.
- cUrl supports SOCKS but Wget does not.
- Wget supports Metalink, but cUrl has dropped Metalink support due to security concerns.
- Wget has recursive downloading abilities that cUrl doesn’t have.
- cUrl offers uploading and sending, but Wget only has plain HTTP POST support.
- cUrl supports HTTPS proxy, while Wget does not.
- cUrl can be built from any of the 13 different SSL/TLS libraries and has wider support for protocols.
- cUrl offers more HTTP authentication methods.
In general, cUrl is a more well-rounded tool. It also has a larger developer community on GitHub and other sites than Wget.
Why use cUrl?
Developers usually choose cUrl because it can handle complex operations very well. It’s versatile, scriptable, and also comes with a library that can be used to pull elements from programs without writing your own HTTP parsing and networking code.
In general, cUrl offers the following advantages:
- Useful for testing endpoints and debugging
- Can provide a lot of details about what has been sent or received
- Excellent error logging
- Support for numerous protocols
- Support for http2, Metalink, gzip, automatic decompression, and Content-Encoding
- Useful features such as FTP upload, cookies, user authentication, proxy support, SSL connections, and more
- Automatically tries different protocols if the default protocol doesn’t work
- URL syntax is dependent on the protocol
- Can be rate-limited
- Ability to specify parts of URLs or multiple URLs by writing parts within parenthesis (i.e., https://google.{one, two, three}.com)
- Ability to specify any number of URLs through the command line
Additionally, many developers use cUrl because it performs SSL certificate verification by default and supports HTTPS. Whenever cUrl connects to a server through HTTPS, it will get the remote server certificate and compare it with the CA certificate to ensure that the remote server is the one it claims to be.
How to Use cUrl

cUrl is accessible on all recent operating systems. If you’re using an older system, such as any Windows version before 10, you may need to download and install cUrl to use it. If your Linux distribution doesn’t have cUrl, you can install it by simply entering the install command. On Ubuntu, for instance, you can open Terminal and enter the following:
sudo apt install curl
After you’ve installed it, open your terminal and type in “curl.” You should then see an offer to use “curl -help.” This command will list out all the commands you can input. You can also combine cUrl commands with the flags listed by “curl -help.”
Depending on your operating system, you may have to use double hyphens (i.e., –help) instead of a single hyphen when entering flags and commands. You can check by running -help or –help. If what you’ve entered is incorrect, cUrl will tell you to use the correct version of the help command to see all of the commands you can input.
cUrl is simple to use and doesn’t require any downloads or plugins — all you have to do is open your terminal and type in the command. It uses the following syntax:
curl [options] [URL]
Before discussing how to use cUrl for web scraping or with a proxy, here’s a look at how you can use some of its basic functions. This will give you a clearer understanding of how cUrl works and what kind of syntax and logic it uses.
Using cUrl to print pages
If you use cUrl without any options, the system will print the source code of the specified URL. For instance, to retrieve the Rayobyte LLC homepage, you would input: https://rayobyte.com/:
If you don’t specify the protocol, cUrl will choose HTTP by default.
If you want to download more than one URL, put -0 before each URL followed by a space:
curl -0 https://rayobyte.com/ -0 https://www.google.com
You can also download part of a URL by listing out different pages:
curl https://rayobyte.(page1, page2, page3).com
Save cUrl downloads
After downloading the content of a URL, you can save the content to a file using two methods:
- The -o method, which lets you add a filename once the URL has been saved. The syntax of this command is:
curl -o filename.html https://rayobyte.com/file.html
- The -O method, which lets you save the file using the URL name. Just add -O before the URL:
- curl -O https://rayobyte.com/
Using cUrl to send requests
Since cUrl was initially created for HTTP, you can send all the typical requests, such as POST, PUT, and GET.
Sending a POST request
Many developers use cUrl to send POST requests. The POST request method requests a web server to accept the data stored in the body of the request message. It’s typically used when submitting a form or uploading a file.
Try sending our first POST request to a URL using a free fake API for prototyping and testing. Simply use the -d (or -data) flag. For instance:
curl =d “name=thing1&value=thing2” https://jsonplaceholder.typicode.com/posts/
You will get this in return:
{
“name”: “thing1”,
“value”: “thing2”,
“id”: 101
}
Notice that:
- The “curl” command started the process.
- -d is for sending POST requests.
- Quotation marks (“) indicate the beginning of this statement. Some operating systems only use single quotes (‘), however.
- The syntax of the URL must always be the same since cUrl doesn’t follow redirects automatically.
To send POST requests in the JSON format, you must provide additional information to tell the server we are sending a JSON file. cUrl automatically sends Content-Type header of application/text by default, so we have to manually add Content-Type: application/json ourselves:
curl -H “Content-Type: application/json” –data “{\”data\”:\”some data\”}” https://jsonplaceholder.typicode.com/posts/
Following redirects
If you suddenly encounter an issue where the output is “Found” or “Found. Redirecting to https://rayobyte.com/,” you can solve the issue by adding -L or –location to your request.
Using cUrl to find out what’s happening in the background
cUrl also lets you find out what happens when you send a request. This can come in handy if you need to know more about your request for debugging.
Just add the -v or –verbose option for a print-out of what’s in the background. You will then get a block of code about what’s in the background.
Adding cookies
Finally, you can add cookies with cUrl. If you need cookies to remember information about you or for a certain site to work, add the –cookie or -b option to specify cookies or the file they will be read from.
You can also receive cookies from the target server and store them to use later. Use the -c or –cookie-jar option to do this:
curl rayobyte.com -c “cookies.txt”
After setting it up, just use the -b command for subsequent requests:
curl rayobyte.com -b “cookies.txt”
How to Use cUrl for Light Scraping

cUrl can also be used for light web scraping. This is done in conjunction with a programming language, such as PHP.
Before you start scraping, however, remember to take a look at the robots.txt file of the website you want to scrape. Follow the rules, even if they don’t make sense to you — you’re on someone else’s website and they have the right to set certain parameters and limit certain activities. Respecting the robots.text file when web crawling is standard behavior. You can run into legal issues if you don’t follow the robots.txt rules, so it’s important to adhere to them.
With that out of the way, here’s a look at how you can use cUrl for light web scraping.
Firstly, there are three options when you use cUrl to scrape a webpage:
- curl_init($url): Initializes the session
- curl_exec(): Executes
- curl_close(): Closes
Other options include:
- Curlopt_url: Sets the URL you want to crawl
- Curlopt_returntransfer: Commands curl to save the scraped page as a variable. This lets you get exactly what you wanted to extract from the page.
To start scraping, follow these steps:
- Choose a program to scrape with, such as PHP. For this tutorial, we will use PHP.
- Open a new PHP file.
- Initiate the cURL handle using curl_init.
$curl = curl_init(“https://rayobyte.com/”)
- Set CURLOPT_RETURNTRANSFER to TRUE. This will return the transfer page as a string. Essentially, it’s telling cUrl to store the scraped page as a variable rather than its default, which is to display the entire page:
curl_setopt($curl, CURLOPT_RETURNTRANSFER, TRUE);
- Start the request and do an error check:
$page = curl_exec($curl);
if(curl_errno($curl)) // check for execution errors
{
echo ‘Scraper error: ‘ . curl_error($curl);
exit;
}
- Close the connection:
curl_close($curl);
- If you only want part of the information, you need to specify what you want to extract under id=”case_textlist.” By default, cUrl will extract the whole page:
$regex = ‘<div id=”case_textlist”>(.*?)<\/div>/s’;
if ( preg_match($regex, $page, $list) )
echo $list[0];
else
echo “Not found”;
Advanced cUrl Settings for Scraping

Here are some advanced cUrl settings that you can use to streamline your scraping sessions.
Adding a user agent
When you use cUrl to download or scrape links, it will announce itself to the website as cUrl. Sometimes, you don’t want this, since certain sites may treat cUrl as a bot and block it.
To get around this, add a user-agent by using the -A or –user-agent option. For this example, we’ve used a Firefox 65 on Windows 10 user-agent:
curl -x https://rayobyte.com/ -v -A
“Mozilla/5.0 (Windows NT 10.0; Win64; x64; rv:65.0) Gecko/20100101 Firefox/65.0”
You can also send the user agent in the header with the -H option:
curl -x https://rayobyte.com/ -v -H
“User-Agent: Mozilla/5.0 (Windows NT 10.0; Win64; x64; rv:65.0) Gecko/20100101 Firefox/65.0”
Setting headers
When scraping a website, you don’t want it to think you’re a bot. Many websites now block bots from scraping their information since they can flood the server and make service slow for human users.
As such, you need to send appropriate headers with cUrl.
First, check to see what headers you usually send to the target website by clicking the right mouse button and selecting “Inspect.” Then, navigate to the “Network” tab. Reload the target site and you will see the requests that are made while the site is loading. To take a closer look at the request, you can also right-click on it and copy it as a cUrl command line.
After that, set headers in cUrl with the -H or –header option. For instance, here’s how you would send an “Accept” header to the target site:
curl -x https://rayobyte.com/ -v -H “Accept: text/html”
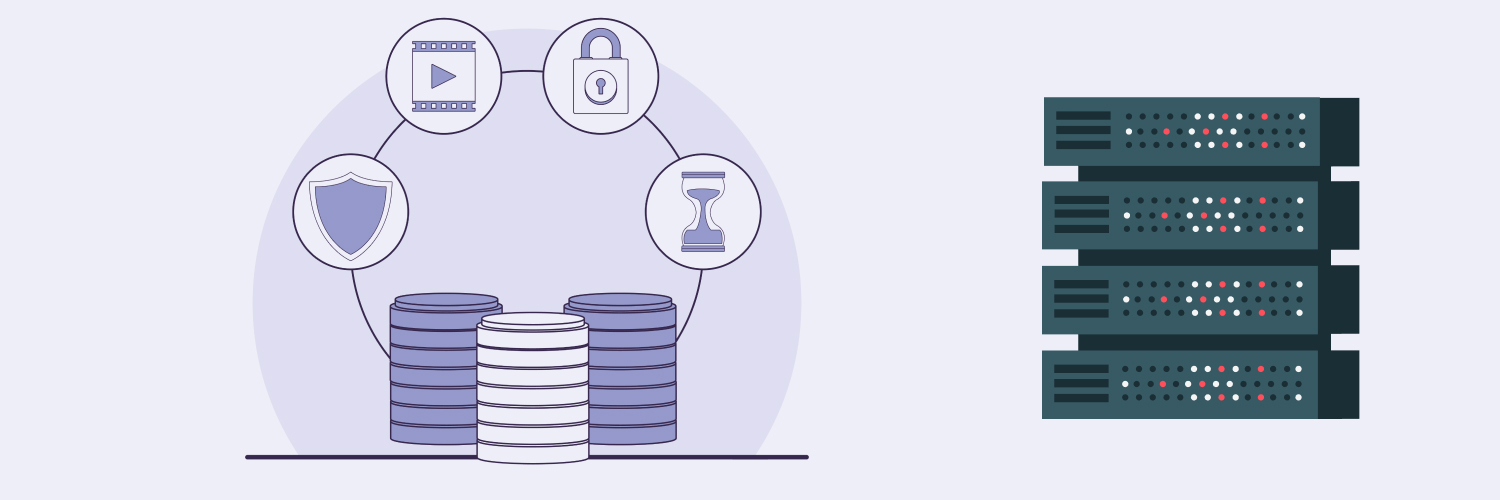
The Best Proxies for cUrl Web Scraping

To scrape as efficiently and effectively as possible, consider using proxies for scraping.
As you may know if you’re familiar with web scraping, a proxy is essentially a middleman between you and the website you’re scraping. If you scrape without a proxy, a website can identify you through your IP address. This isn’t a problem if you’re only scraping one or two pages every day. However, if you’re scraping multiple pages of a site 24/7 through various bots, you’ll trigger the website’s anti-scraping scripts.
After all, scrapers generate requests much faster than humans can, making them stand out from real human users. Websites will also be able to sense that your scraping bot isn’t a human user because it’s scraping non-stop using one IP address. Even if you’re not technically using a scraping bot and only using cUrl and PHP, you might get an IP ban or blacklist since many sites don’t want non-human users to access their site.
Why you should use proxies when web scraping
On the other hand, if you use a proxy, you can use hundreds, if not thousands of IPs. This will make it very difficult for sites to detect you when you’re scraping data. By constantly changing your IP address and choosing a set of locations to scrape from, your cURL scraper will be able to avoid virtually all IP bans and blocks.
Here are two of the best proxies that you can use for cUrl web scraping.
Rotating residential proxies
Residential proxies originate from physical addresses that internet service providers issue to users. In other words, these residential proxies are the same type of IP addresses that you have at home. They are extremely valuable for web scraping since they look and feel like human users rather than robots.
The Best rotating residential proxies with Rayobyte
If you want to scrape effectively and efficiently, consider Rayobyte’s rotating residential proxies. Powerful and ethically sourced, our residential proxies will automatically rotate your IP addresses at timely intervals. This will make your scraper look like a human user, so it never gets caught by your target website’s anti-scraper traps.
Rayobyte’s rotating residential proxies are an all-in-one solution. They offer the highest level of ban and block prevention so that you can focus on reaching your goals efficiently and quickly. Our proxies are:
- High-authority and high-powered, which means sites are less likely to sense and ban your software when you scrape with our proxies.
- 100% ethically sourced, which means they go through an in-depth vetting process and users are compensated for their proxy use.
- Have the full support of our partners. We make sure that our partners are fully aware of their agreement to share their bandwidth and give them the ability to opt-out any time they want. (Our proxies are sourced through Cash Raven (our bandwidth-sharing application), developer SDKs, or resellers who share our ethical commitments.)
- Capable of API access, which means you can manage your proxies automatically and easily. Add and remove IP authorizations, download your list of current proxies, and more.
- A powerful dashboard that lets you upgrade/downgrade, manage proxy lists, authorize devices, adjust settings, switch locations, and more.
- Optimization for Proxy Pilot. Proxy Pilot is our free proxy management tool. It efficiently routes your requests to the right IPs to give you the highest possible success rates.
Like the rest of our products, our residential proxies also come with:
- A Personalized Relationship. Our goal at Rayobyte isn’t to sell you proxies — it’s to give you success.
- Unmatched Commitment to Ethics. Rayobyte has established a high standard of ethical acquisition of residential proxies that we hope will set the standard for the whole industry. With us, “consent” really means consent. Read more about our commitment to ethics here.
- Premier IT Support. We offer IT support 24/7. Our senior engineers will answer any questions you have about our residential proxies.
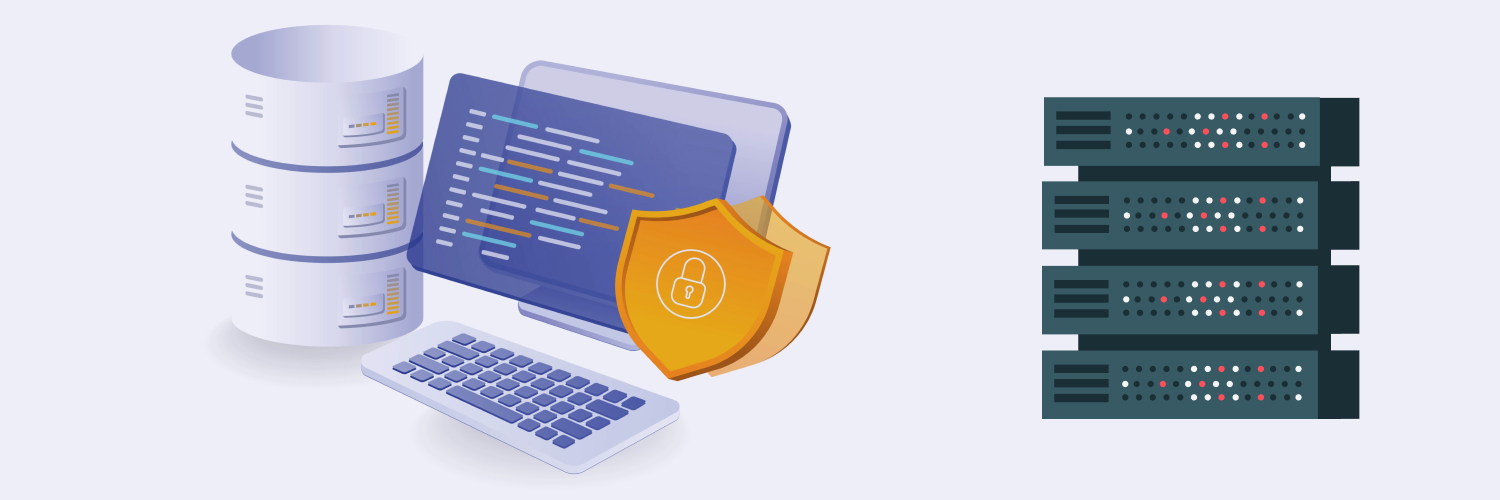
Data center proxies
If residential proxies don’t give you enough options, consider data center proxies. These proxies come from data centers instead of internet service providers and are extremely quick.
However, they’re more likely to get banned from websites when used for scraping since they’re housed in a data center as opposed to residential IPs. As such, if you decide to use data center proxies for cUrl scraping, pick a provider that has a lot of subnet diversity. You should also check the robots.txt of the websites you want to scrape since many websites block all traffic from data centers.
The best data center proxies with Rayobyte
Rayobyte’s data center proxies are a superior product when it comes to technical features. These proxies are faster than residential proxies and offer more diversity. Specifically, Rayobyte’s data center proxies offer:
- 300,000+ IPs: With such a diverse pool of proxies to choose from, the likelihood of getting banned is lower than ever. Even if a couple of your proxies get banned, there’s no way any bot or script can ban all of them at once.
- 20,000 C-Class subnets: Our team will work with you to customize your subnets to get the right mix of cost and performance. We also have A- and B-classes. Learn more by checking out one of our ARIN profiles.
- 27 Countries: We offer proxies from the U.S., the U.K., Canada, Australia, China, Singapore, South Korea, Japan, Mexico, the Netherlands, Pakistan, Poland, South Africa, Thailand, Taiwan, Spain, Vietnam, and more. We also add more every month. If you want to request one, go to our Enterprise page.
- 9 ASNs for maximum diversity and redundancy. While most sites only ban one IP at a time, some could ban an entire autonomous system number (ASN). If that happens, we’ve got you covered. We’ll instantly change your proxies to one of the other eight ASNs so you can continue scraping.
- 25 Petabytes per month: 1 petabyte is equal to 1,024 terabytes and around 4,000 digital photos per day over the course of your lifetime.
Additionally, you’ll get to enjoy:
- API access: With our data center proxies, you’ll be able to replace IPs that don’t work, add and remove IP authorizations, and download your current proxy list.
- Free IP replacements: We offer automatic 30-day replacements and individual IP replacements every month. The number of monthly replacements is equal to the total number of proxies you order.
- Unlimited connections and bandwidth: You won’t have any bandwidth or thread limitations when using our data center proxies. This means you get the most out of your proxies in terms of efficiency and affordability.
- A browser-based dashboard that gives you total control
- 24/7 tech support
- Proxy types and authorization such as:
- HTTP, HTTP(S), and SOCKS
- IPv4 and IPv6
- IP and User:Pass Authorization
- Rotating, dedicated, and semi-dedicated
Tips for working with proxies
Now that you’ve picked the right proxy for your scraping project, here are some things to keep in mind before you start using cUrl with proxies:
Pagination
Before you start scraping, you need to consider how your target’s webpage is set up. Think about whether it displays everything on one page or whether it’s paginated, which means you have to click on various widgets to load more data. If you don’t consider this, you may only end up with some of the data you want. As such, you need to look at your scraper and deal with this issue in the settings.
CAPTCHAs
When scraping websites, you may encounter a Completely Automated Public Turing test to tell Computers and Humans Apart (CAPTCHA). This can be frustrating since your scraper may not be able to handle a CAPTCHA. Even if you try to integrate them with third-party CAPTCHA breakers, the integration doesn’t work as well as it should.
Fortunately, you can buy scraping programs that can solve a CAPTCHA. However, these tend to cost more. You will have to do a cost-and-benefit analysis to determine whether you’re willing to pay more for a CAPTCHA-solving program or whether you’re okay with just avoiding sites that have CAPTCHAs.
How to Use cUrl With a Proxy

Now that you know the basics of cUrl and why you should use proxies for scraping, let’s take a look at how you can use cURL with proxy servers.
cUrl can be used to do a number of things with proxies, including:
Identify your IP address
The first thing you should do when using cUrl with a proxy is to identify your IP address. Enter curl ipinfo.io into the terminal and you will see your current IP address.
Check your proxy server
cUrl lets you test whether your proxies are working through the -x or –proxy options. Use them to specify the proxy that you’ll be using in your request using the following syntax:
curl -x [proxy server’s IP address or domain name]:[port number] something.io
or
curl -x [proxy server’s IP address or domain name]:[port number] something.io
Set or connect to proxy servers
Regardless of which proxy service you use, you will need the following to connect to a proxy:
- Proxy server address
- Protocol
- Port
Open the terminal, type in the following, and press “Enter”:
curl –help
You will then see a comprehensive list of flags and options. Pay particular attention to this one:
-x, –proxy [protocol://]host[:port]
This is the command we’ll be focusing on. You can use -x or -proxy to give proxy details since they do the same thing. That’s why these two snippets will have the same outcome:
curl –x “http://usr:[email protected]:0123” “https://jsonplaceholder.typicode.com/posts/“
curl –proxy “http://usr:[email protected]:0123” “https://jsonplaceholder.typicode.com/posts/“
If you encounter any SSL certificate errors, add -k or –insecure after the curl command to enable insecure server connections while using SSL:
curl –proxy “http://usr:[email protected]:0123” “https://jsonplaceholder.typicode.com/posts/” -k
Set a proxy specifically for cUrl
If you want to set up a proxy for cUrl but not for other applications, you can create a cUrl config file. This feature allows you to write command lines in a text file and tell cUrl to read commands from the text file along with those in the command line. This can come in handy when you’re getting close to the maximum length that the command-line system allows.
To create a cUrl config file in MacOS and Linux, open the terminal and go to your home directory. If you see a .curlrc file, open it. If you don’t see one, create a new file and run:
cd ~
nano .curlrc
In the new file, add:
proxy=”http://usr:[email protected]:0123″
Save the file. You can now use cUrl with the proxy. Just run cUrl and the application will read the proxy from the newly created .curlrc file:
curl “https://jsonplaceholder.typicode.com/posts/“
If you’re on Windows, .curlrc is called _curlrc. It should be in the %APPDATA% directory, so run the following command to find its exact location:
echo %APPDATA%
You will get a response like C:\Users\<your_user>\AppData\Roaming. Go to this location and create a new file named “_curlrc. Then, set the proxy using this line:
proxy=”http://usr:[email protected]:0123″
Override or ignore a proxy for one request
If your proxy is set globally or through the .curlrc file, you can override it to bypass it or set another proxy.
To override the proxy for one request, use -x or -proxy as you normally would:
curl –proxy “http://usr:[email protected]:0123” “https://jsonplaceholder.typicode.com/posts/“
If you want to bypass the global proxy entirely, use -noproxy with a “*”. This will tell the application to avoid the proxy for all URLs after this command.
curl –noproxy “*” “http://usr:[email protected]:0123” “https://jsonplaceholder.typicode.com/posts/“
Connect to SOCKS proxy
If the proxy server uses SOCKS protocol, the syntax is the same:
curl -x “socks5://usr:[email protected]:0123” “https://jsonplaceholder.typicode.com/posts/“
Different versions of SOCKS, such as socks4://, socks4a://, socks5://, or socks5h://, can be used.
You can also use -socks5 (or -socks4, socks4a, or socks5h, depending on the version) instead of -x to curl socks proxy. Note, however, that the username and password will be sent to the back of the command after -proxy-user. For example:
curl –socks5 “128.1.1.1:0123” “https://jsonplaceholder.typicode.com/posts/” –proxy-user usr:pass
Using proxies with authentication
Some proxies require authentication. You’ll know when you enter a command but get rejected by the server. For instance:
curl -l -x “socks5://aaa:[email protected]:0123” “https://jsonplaceholder.typicode.com/posts/“
curl: (7) User was rejected by the SOCKS5 server (1 1).
This means that you will be blocked from using a proxy unless you add credentials to your proxy URL. You can do so by adding the right username and password between the protocol and the server:
socks5://[username]:[password]@[proxy server]:[port]
For this tutorial, we’re going to set the proxy server as 128.1.1, the username as usr, the password as pass, and the port as 0123.
There are a couple of ways to use cURL with HTTP or HTTPs proxies.
cUrl in Linux

Linux cUrl works the same way as Windows cUrl. However, there are some things you can do in Linux that you can’t in Windows.
Turn proxies on and off quickly
In Linux, you can use cUrl to turn proxies on and off quickly. Essentially, you do this by creating an alias in your .bashrc file.
A .bashrc file is a type of shell that can be used by Linux terminals. When you log into Raj, which is a Linux server without a desktop GUI interface, a couple of login scripts will start running to load your personal preferences. One of these is .bashrc, which is automatically created when you create an account. You can then modify .bashrc to customize your session.
.bashrc is a shell script, so any bash command can be placed inside it. This is how you can use .bashrc to modify environment variables, activate Python environments, and load modules.
To set and unset proxies, open .bashrc with any editor and enter the following:
alias proxyon=”export http_proxy=’ http://usr:[email protected]:0123′;export https_proxy=’ http://usr:[email protected]:0123′” alias proxyoff=”unset http_proxy;unset https_proxy”
Save the .bashrc file. Then, update the shell and get the system to read it by running the following in the terminal:
. ~/.bashrc
From now on, you can turn on the proxy by running curl and turn off the proxy with the following:
proxyon
curl “https://jsonplaceholder.typicode.com/posts/“
curl “http://google.com”
proxyoff
Use and set environment variables
In Linux, you can also use a proxy with cUrl by setting and using the environment variables https_proxy and http_proxy. This method can also be done on Mac, but not on Windows.
Note that this method sets a proxy for the whole system, not just for cUrl.
http_proxy can be used to access addresses that use the HTTP protocol, while https_proxy can be used to access addresses that use the HTTPS protocol. For example, enter these two lines in the terminal:
export http_proxy=”http://usr:[email protected]:0123″
export https_proxy=”http://usr:[email protected]:0123″
Then, press “Enter” and run cUrl.
curl “http://usr:[email protected]:0123”
As discussed above, if you come across SSL certificate issues, type -k after the line to bypass them.
To turn off this global proxy, enter:
unset http_proxy
unset https_proxy
Conclusion

All in all, using a cUrl with a proxy is a flexible tool that you can use to do almost anything, from sending requests to setting proxies.
To make the most out of cUrl’s web scraping capabilities, consider one of our plans for our residential proxies or data center proxies. For most scraping projects, our residential proxies will do. However, if the website you want to scrape allows data center IP addresses and you need to scrape a lot of data, our data center proxies are a great choice. Our data center proxies come with unlimited connections and bandwidth, more than 300,000 IPs, 20,000 unique C-class subnets, and more.
For a more thorough understanding of the differences between residential and data center proxies, check out our buyer’s guide to residential and data center proxies. You can also start a risk-free, two-day trial to see which package option suits you the best. We offer four pricing packages and subscription lengths of one month, three months, six months, and 12 months. If you have any questions about our company, our products, or proxies in general, reach out to us today.
The information contained within this article, including information posted by official staff, guest-submitted material, message board postings, or other third-party material is presented solely for the purposes of education and furtherance of the knowledge of the reader. All trademarks used in this publication are hereby acknowledged as the property of their respective owners.