Web Scraping eBay
How to Build an eBay Scraper using Puppeteer, a Powerful Node.js Library
eBay, one of the largest online marketplaces, contains a wealth of product data, including prices, descriptions, and seller ratings. In this tutorial, we’ll walk you through web scraping eBay using Python. You’ll learn how to extract product listings, prices, and seller information, enabling you to compare products, track pricing trends, and gather valuable insights from eBay’s vast marketplace. This guide includes the necessary source code and techniques for scraping eBay efficiently.
You can find the complete source code for this project on my GitHub: GitHub Repo
Table of Content
- Introduction
- What is Puppeteer
- Prerequisites
- Setting Up Puppeteer
- Navigating and Executing Search Query
- Extracting Products Data
- Getting More Data
- Saving Data to CSV
- Wrapping Things Up
- Conclusion
Introduction
eBay is one of the largest e-commerce platforms, offering an immense variety of products ranging from everyday essentials to rare collectibles. For businesses, researchers, and data enthusiasts, eBay’s marketplace is a valuable source of information on product trends, pricing strategies, customer behavior, and more. Whether you’re interested in tracking the latest sales data, comparing prices, or analyzing product listings, having access to this data can help drive informed decisions.
However, manually extracting this information is a daunting task given the volume of products listed on eBay. That’s where web scraping comes into play.
In this tutorial, we will show you how to build an eBay scraper using Puppeteer, a powerful Node.js library that provides a high-level API to control headless Chrome or Chromium browsers. By the end of this guide, you will have a fully functional scraper capable of automating the extraction of product data from eBay, allowing you to easily gather valuable insights.
What is Puppeteer
Puppeteer is a popular Node.js library developed by Google that provides a high-level API to control Chrome or Chromium browsers via the DevTools Protocol. It is commonly used for web scraping, automated testing, and browser automation, allowing developers to interact with web pages programmatically.
With Puppeteer, you can automate tasks that would otherwise require a manual browser interaction, such as navigating to pages, clicking buttons, filling out forms, and capturing data from web elements. One of the key advantages of Puppeteer is its ability to run in a headless mode, meaning it operates without a visible UI, which makes it faster and more resource-efficient for scraping tasks.
Key Features of Puppeteer:
- Headless browser automation: Perform tasks without a browser UI, improving performance.
- Accurate rendering: Scrape web pages as they appear in a real browser, ensuring you’re working with up-to-date and rendered data.
- Flexible navigation control: Simulate user interactions, handle redirects, and automate navigation through dynamic pages.
- Built-in network interception: Modify requests and responses, handle API calls, and interact with server-side data.
Puppeteer’s flexibility and reliability make it an excellent choice for scraping dynamic websites like eBay, where product listings change frequently and JavaScript-driven content needs to be handled smoothly.
Prerequisites
Before we dive into the code, let’s make sure you have everything set up. Here’s what you’ll need:
- Node.js: Puppeteer runs on Node.js, so make sure it’s installed on your machine. You can download it from here.
- Puppeteer: Puppeteer is a Node.js library that provides a high-level API for controlling Chrome or Chromium.
- Objects-to-CSV: This library will help convert the scraped data into a CSV file.
Installing Dependencies
First, let’s set up our project and install the required dependencies.
# Initialize a new Node.js project
npm init -y

# Install Puppeteer and Objects-to-CSV
npm install puppeteer objects-to-csv
Now that we have our environment ready, let’s move on to setting up Puppeteer.
With Puppeteer installed, let’s create the main script that will handle all our web scraping logic.
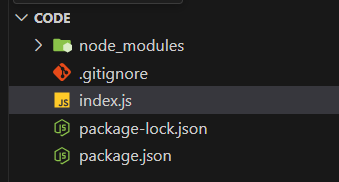
In the root of your project, create a file named index.js.
Setting Up Puppeteer
In the index.js file start by requiring the Puppeteer package we just installed:
const puppeteer = require('puppeteer')
Next, we’ll create an asynchronous function where all our scraping logic will live. This function will take a searchQuery as a parameter, which we’ll use to search for items on eBay:
async function run(searchQuery) {
   // All of our logic goes here!
}
run("Nike Air Jordan")
Let’s bring the browser to life! We’ll use Puppeteer’s launch function to create a new browser instance:
const browser = await puppeteer.launch({
    headless: false // We want to see what's happening!
})
The headless: false option keeps the browser UI visible so you can watch Puppeteer in action. It’s super helpful when you’re just getting started.
Next, we’ll create a new page where all our browser actions will take place:
const page = await browser.newPage()
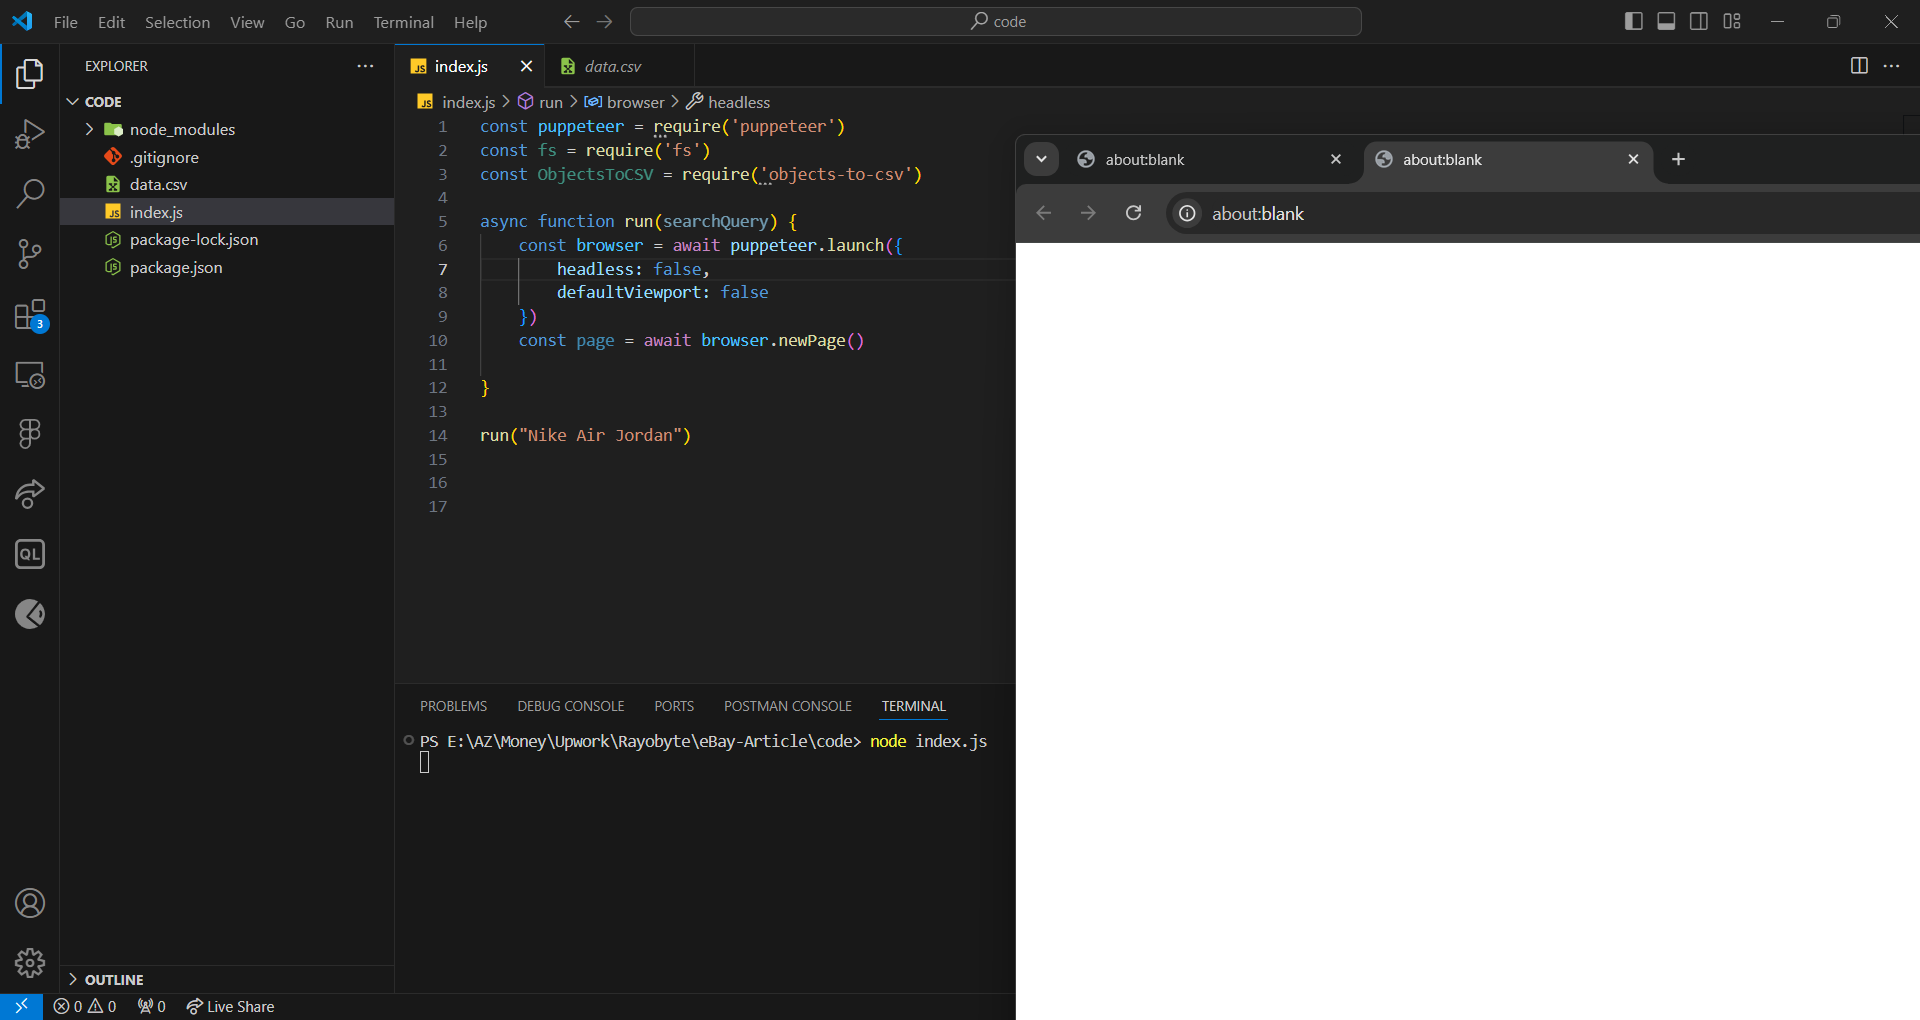
Now your code should look something like this:
const puppeteer = require('puppeteer')
async function run(searchQuery) {
    const browser = await puppeteer.launch({
        headless: false,
        defaultViewport: false
    })
    const page = await browser.newPage()
}


run("Nike Air Jordan")
You’ve set up everything, let’s see it in action! Run the project by typing the following command in your terminal: node index.js
Now that we’ve got our project up and running, it’s time to navigate to the eBay website and start scraping some data
Navigating and Executing Search Query
After setting up the browser, the next step is to navigate to the eBay website, perform a search on eBay, and extract relevant data like product titles, prices, and links. For this example, we’ll search for “Nike Air Jordan”.
Step 1: Navigate to the main website
To get there, we’ll use the page.goto() function. This nifty function takes the URL of the page we want to visit and an options object that controls how we navigate. We’re particularly interested in the waitUntil property, which we’ll set to “domcontentloaded” to ensure that all the DOM elements are fully loaded before we proceed.
await page.goto("https://www.ebay.com/", {
    waitUntil: "domcontentloaded"
})
Pro Tip: Don’t forget to add the await keyword before any asynchronous function calls, like page.goto(). This ensures that your code waits for the navigation to complete before moving on to the next step.
With the page loaded, we’re all set to start interacting with the eBay website and search for the products we’re interested in.
Step 2: Executing the search query
First, we must open our local browser and navigate to the eBay page we’ve been working with. To interact with the page elements, we’ll need to use Chrome’s DevTools, which you can easily open by pressing F12.
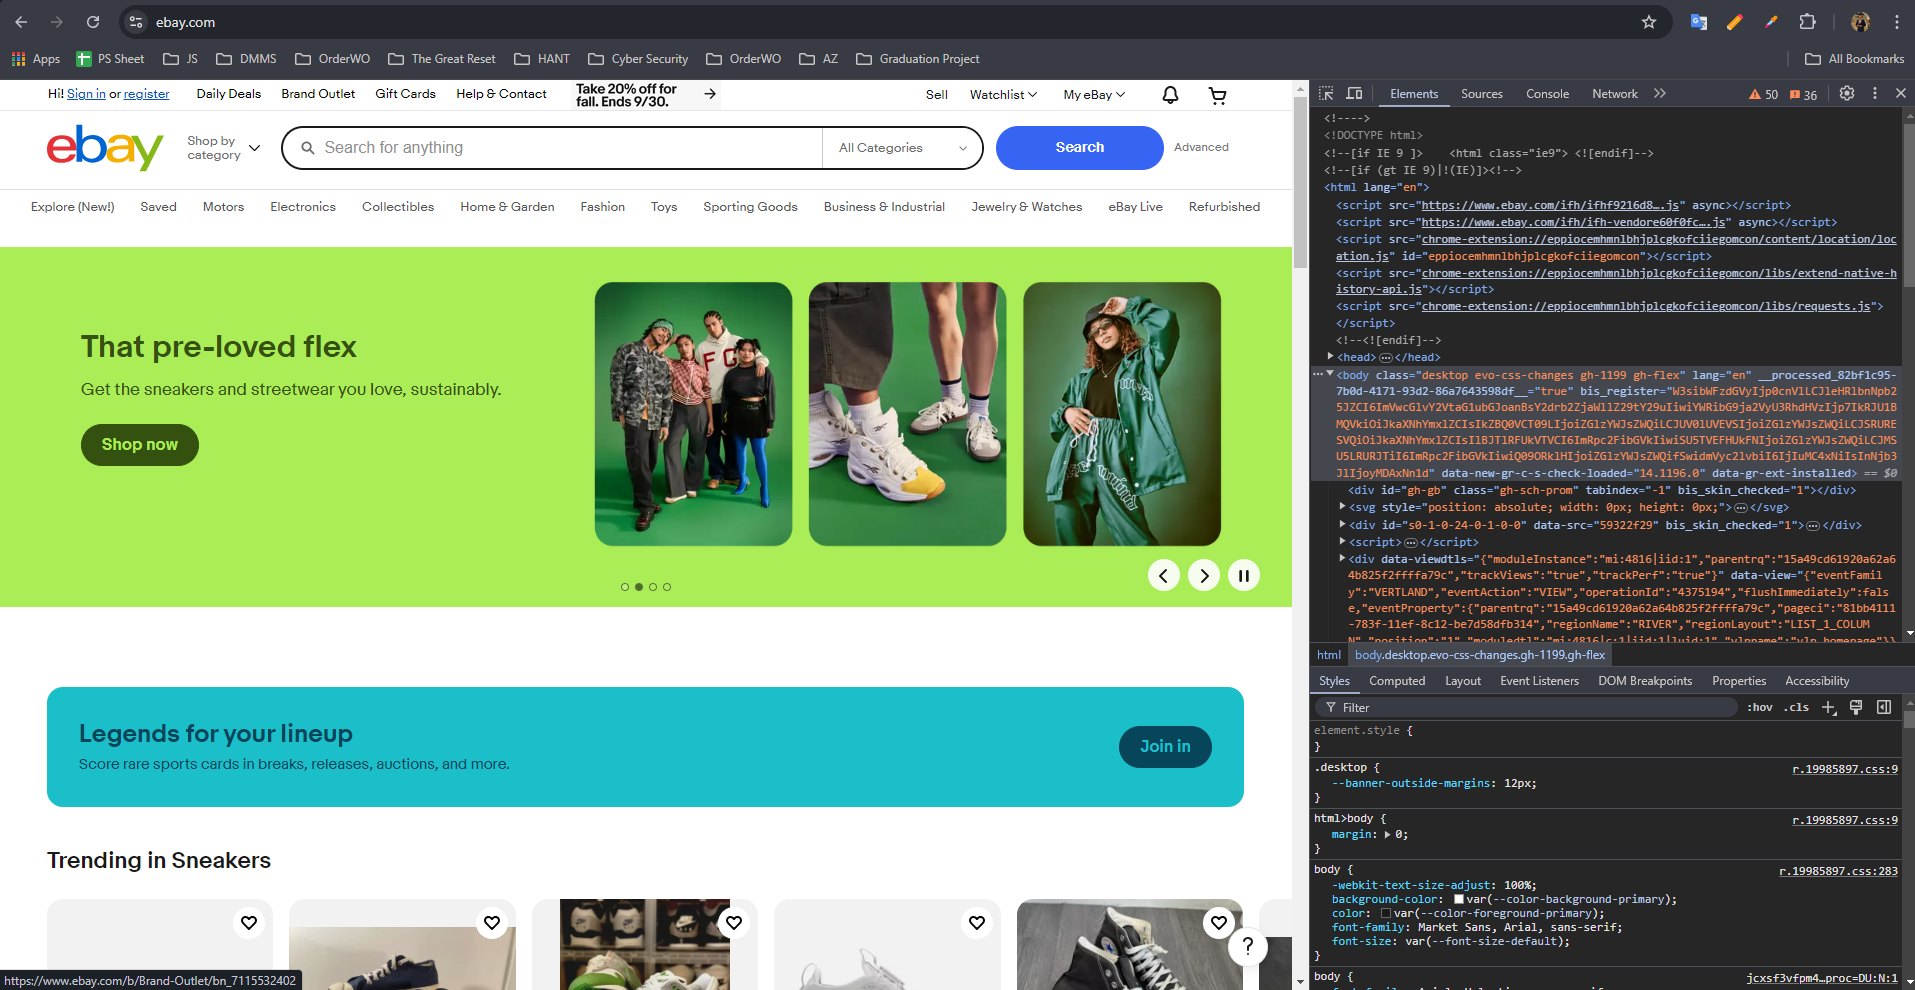
With DevTools open, select the inspector tool (the little arrow icon at the top left of the DevTools window) and click on the search button on the page. This will highlight the element in the DOM tree.


Now we can copy either the ID or the class name for the element we just selected

Now we can do this for any element we want to interact with or extract data from it
Step 3: Performing a Search
Here’s how you can simulate entering a search query and clicking the search button:
await page.type('#gh-ac', searchQuery)
await page.click('#gh-btn');
await page.waitForNavigation();
page.type(): Types the search query (in this case, “Nike Air Jordan”) into eBay’s search bar.
page.click(): Simulates clicking the search button.
page.waitForNavigation(): Ensures the page fully loads after the search is performed.
Extracting Product Data
We now want to scrape data from the search results, including the product title, price, link, and additional details like the item’s location and shipping price.
const items = await page.evaluate(() => {
    return Array.from(document.querySelectorAll('.s-item')).map(item => ({
        title: item.querySelector('.s-item__title')?.innerText,
        price: item.querySelector('.s-item__price')?.innerText,
        link: item.querySelector('.s-item__link')?.href,
        image: item.querySelector('img')?.src,
        status: item.querySelector('span.SECONDARY_INFO')?.innerText,
        location: item.querySelector('.s-item__itemLocation')?.innerText.slice(5),
        shippingPrice: item.querySelector('.s-item__shipping')?.innerText
    }));
});
We will start by evaluating the page and querying different items, using the dev tool’s inspector we notice that each item listed on the page has the class name “.s-item”, so we start by querying all the items in the page using document.querySelectorAll()
Then we map each item to our response object which will contain all the details we need to scrap by querying in the item itself with each class name extracted from the website’s DOM
The extracted data should look something like this:
{
    title: 'Nike Air Jordan 12 Retro Neoprene Nylon Size 11 130690-004',
    price: '$39.99',
    link: 'https://www.ebay.com/itm/146043984554?_skw=Nike+Air+Jordan&epid=3039805884&itmmeta=01J8B67X1KF2T9X9SEYCA36PMP&hash=item2200e65aaa:g:-gkAAOSwvRNiJVFH&itmprp=enc%3AAQAJAAAA8HoV3kP08IDx%2BKZ9MfhVJKln8UADzlkgSZ0aU6TLWzt99BeJHA0IFazs9V%2FJYxXTuAWc%2BD7Hb%2F5qJW96HOFfRt6kV2RuFlSWxTiZPtmnnrFl2KasCUsxQ%2FP%2FVxEqaTZbFwpkTTjB9tBFrhOYNUejqJqLXWZc16hrE3dmgoF%2F8HI9hHLMdIsxSLH7C9%2BBDPiuE7sJ8%2FBm6cGz1hhI0sxGKf4%2BcojTVtkMemnYFMI73q9RrYmCtPlOP6iRHMk9G4zJVbUzkgzDqKPZc%2BOhp86K4h4ahNVJcPCLVhQFayCTcKLWfow4u5sDXlT7l54M6p1dVw%3D%3D%7Ctkp%3ABk9SR4bRn-bCZA',
    image: 'https://i.ebayimg.com/images/g/-gkAAOSwvRNiJVFH/s-l140.webp',
    status: 'Pre-Owned',
    location: 'United States',
    shippingPrice: '+$89.85 shipping'
  }
document.querySelectorAll: Targets all elements with the class .s-item (which are the product listings).
map: Iterates each item and extracts the desired information like the title, price, and link.
Getting More Data
When scraping eBay, the default search results page displays only a limited number of products typically 60 per page. However, you can collect more data by implementing two strategies:
- Scraping Multiple Pages: By navigating through multiple pages of search results, you can gather product information across different listings, significantly increasing the dataset for your analysis.
- Changing the Number of Products per Page: eBay allows users to change the number of items displayed per page. By adjusting the query parameters in the URL, you can increase the number of products listed on each page, enabling you to scrape more data in a single request. In our case, we modify the query parameter _ipg to display up to 240 items per page.
Understanding Query Parameters
Query parameters are key-value pairs that are appended to the URL after a question mark (?). They allow websites to customize the content displayed based on user input, such as search terms, filters, and pagination. For example, when navigating eBay search results, query parameters like _ipg control the number of items per page, and _pgn controls which page of the results is displayed.
In our eBay scraper, we take advantage of these parameters to:
- _ipg: Specify how many products to display per page (e.g., 60, 120, or 240).
- _pgn: Move through different pages of search results by incrementing the page number.
By combining these techniques scraping multiple pages and increasing the items per page you can significantly enhance the volume of data collected from eBay.
Let’s get to work, firstly we need to move the extracting logic into a separate function so we can use it for multiple pages, this function will the page object and the pageNumber as parameters
async function extractItemsPerPage(page, pageNumber) {
   const items = await page.evaluate(() => {
        return Array.from(document.querySelectorAll('.s-item')).map(item => ({
            title: item.querySelector('.s-item__title')?.innerText,
            price: item.querySelector('.s-item__price')?.innerText,
            link: item.querySelector('.s-item__link')?.href,
            image: item.querySelector('img')?.src,
            status: item.querySelector('span.SECONDARY_INFO')?.innerText,
            location: item.querySelector('.s-item__itemLocation')?.innerText.slice(5),
            shippingPrice: item.querySelector('.s-item__shipping')?.innerText
        }));
    });
    return items
}
Now let’s manipulate the URL to change the query parameters, and navigate to the new URL
let currentUrl = page.url();

let newUrl = new URL(currentUrl);

newUrl.searchParams.set('_ipg', '240');
newUrl.searchParams.set('_pgn', pageNumber);

await page.goto(newUrl.toString(), {
   waitUntil: "domcontentloaded"
})
Finally, the function should look like this:
async function extractItemsPerPage(page, pageNumber) {
    let currentUrl = page.url();

    let newUrl = new URL(currentUrl);

    newUrl.searchParams.set('_ipg', '240');
    newUrl.searchParams.set('_pgn', pageNumber);

    await page.goto(newUrl.toString(), {
        waitUntil: "domcontentloaded"
    })

    const items = await page.evaluate(() => {
        return Array.from(document.querySelectorAll('.s-item')).map(item => ({
            title: item.querySelector('.s-item__title')?.innerText,
            price: item.querySelector('.s-item__price')?.innerText,
            link: item.querySelector('.s-item__link')?.href,
            image: item.querySelector('img')?.src,
            status: item.querySelector('span.SECONDARY_INFO')?.innerText,
            location: item.querySelector('.s-item__itemLocation')?.innerText.slice(5),
            shippingPrice: item.querySelector('.s-item__shipping')?.innerText
        }));
    });
    return items
}
Now we can call this function multiple times with different page values in the run function, and concat all results together in one array
let items = []

try {
    const page1_items = await extractItemsPerPage(page, 1)
    items = items.concat(page1_items)
} catch (e) {
    console.error("error extracting data page:", 1)
}

try {
    const page2_items = await extractItemsPerPage(page, 2)
    items = items.concat(page2_items)
} catch (e) {
    console.error("error extracting data page:", 2)
}

try {
    const page3_items = await extractItemsPerPage(page, 3)
    items = items.concat(page3_items)
} catch (e) {
    console.error("error extracting data page:", 3)
}
Tip: Wrap your function calls with a try-catch to avoid the program crashing upon error
Save Data to CSV
After scraping the data, we’ll store it in a CSV file for easy access and analysis. For this, we’ll use the objects-to-csv npm library.
We will need to require it at the top of the file and create a function that takes an array as input and saves it to a CSV file called data.csv
const ObjectsToCSV = require('objects-to-csv')

async function saveToCSV(items) {
    const csv = new ObjectsToCSV(items);
    await csv.toDisk('./data.csv', {
        allColumns: true
    });
}
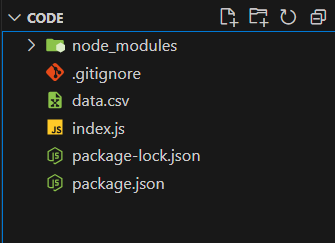
Now the data should be saved into a CSV file in the project root directory

Wrapping Things Up
The last thing we need to do to wrap things up we would need to close the browser after the scraping is done
await browser.close()
Tip: after the project is done and tested now we can switch the headless mode to true to be faster and avoid any issues or bugs
const browser = await puppeteer.launch({
   headless: true,
   defaultViewport: false
})
Conclusion
Congratulations! You’ve just built a web scraper that extracts product information from eBay using Puppeteer. By following this tutorial, you’ve learned how to:
- Set up Puppeteer to navigate websites
- Extract data from eBay product listings
- Handle pagination for multiple pages
- Save the scraped data to a CSV file for future use
You can find the complete source code on my GitHub: GitHub Repo
You can also watch the full tutorial on Youtube here
Feel free to experiment with different search queries and extend this project further by adding more features or extracting additional details.


Responses